When it comes to screen recording on Macs, there are several issues. For many people, using a Mac is no big issue. But for someone who has newly shifted to macOS from Windows find it really difficult how to screen record on Mac and what are the available methods for screen recording on Mac.
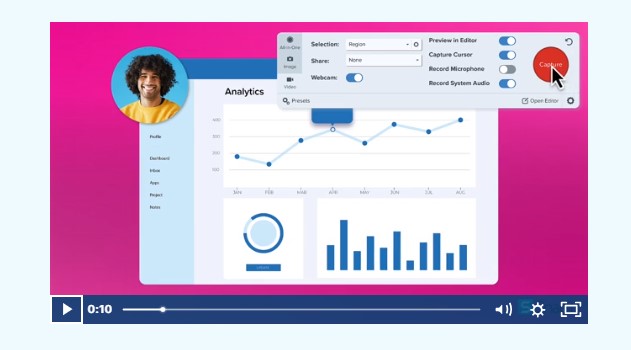
The Mac includes various built-in features for capturing screens. You can use the QuickTime Player, a built-in screen recording application. There is a Screenshot Toolbar available on MacBooks for taking screenshots and recording screens. There are some applications also available for that.
In this article, We will explain to you some built-in tools for screen recording.
1. How to Screen Record on Mac with QuickTime Player?
It’s very easy to use QuickTime player for this purpose. Let’s comprehend how to actually perform it.
- Go to the Toolbar of your MacBook.
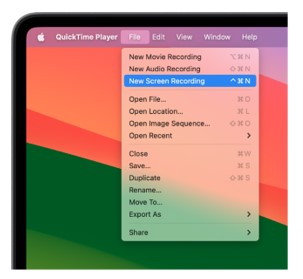
- Select the QuickTime Player app from the Toolbar.
- Select the option of File from the Menu Bar.
- Click on “New Screen Recording”.
- If you want to change your screen recording settings then click on an arrow next to the Recording button.
- A new dropdown window will open with settings options.
- If you want to record video sound with the screen recording, then check the option of system audio.
- If you want to record your voice with a microphone then check the option of internal microphone from the dropdown.
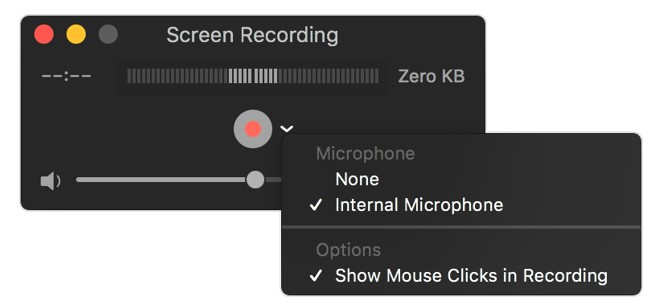
- If you want to use an external mic to record audio then check the option of microphone.
- To show your mouse pointer with a dark shadow while clicking on the screen, select the option of Mouse Click from the settings.
- Click on the recording button to start and stop the screen recording.
- A specific area can be selected for recording also.
- Click and drag your mouse to select this area.
- After completing the screen recording, you can stop it by pressing the Esc key.
2. How to Screen Record on Mac with the Screenshot Toolbar?
The Screenshot Toolbar method is applicable for Macs with OS of Mojave (or later). This tool for MacBook users is just like a Swiss Army Knife for quick recording tasks.
- Open the Screenshot Toolbar on your Mac by pressing Shift + Command + 5 simultaneously.
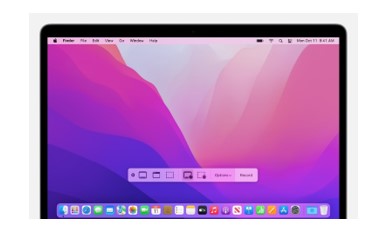
- After opening the Screenshot Toolbar on your Mac, you will see numerous options.
- Hover your mouse pointer on these options to view details and functions.
- To record your whole screen or a part of your screen, go to the left Toolbar of the screenshot toolbar.
- If you want to record a part of your screen, then click and drag your mouse pointer on the screen. Select a part of the screen for recording.
- Click on the recording button to start the screen recording.
- To stop the recording, click on the stop button or press Command (⌘) + Control + Escape from your keyboard.
Apple has made it a lot easier to perform screen recording on Mac. You can do it in 3 ways. By using the QuickTime Player, using ScreenShot Toolbar, and using third-party applications.
3. How to Screen Record on Mac with Third Party Software
As QuickTime Player and Screenshot Toolbar are the built-in tools for MacBooks to record screens. But if you are searching for software that offers some advanced features of screen recording, then you can go for some third-party screen recording tools. We have mentioned some of them as follows.
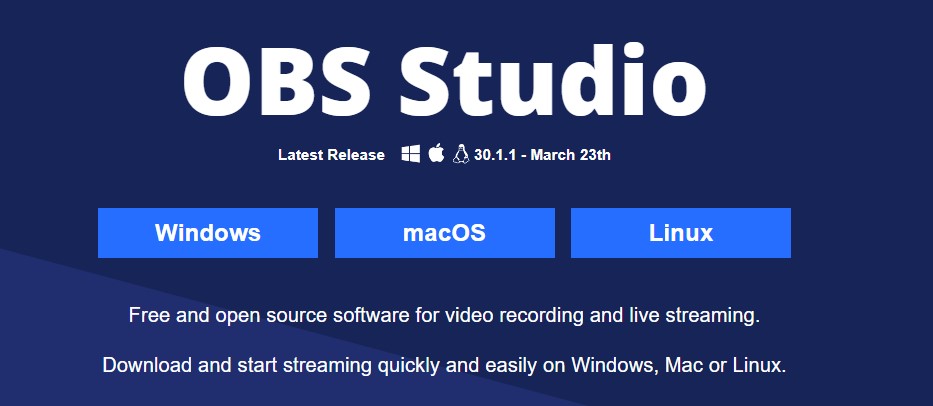
1. OBS Studio
OBS Studio is a dedicated screen recording software that can be used on Windows as well as on MacOS Ventura and newer operating systems. But this software is not very user-friendly. Because it needs it requires some specific features in your system and is a bit difficult to use. You can download OBS Studio via this link, https://obsproject.com/download
2. Camtasia
If you are able to afford an expensive third-party screen recording tool for your Mac, then you can go for Camtasia. This tool allows you to record screens from specific windows, and applications. It has some very powerful recording and editing features. But the problem here is that it is not free and a bit too expensive.
3. VMaker
If you are in search of screen recording software with helpful editing features, then you can go for VMaker screen recording software. This software allows you to record specific screens of your Mac or any application with its internal audio.
If you want to record short videos, then you can use it for free. But if you want to record long videos, then you must have a subscription. The subscription programs offered by VMaker are not that expensive.

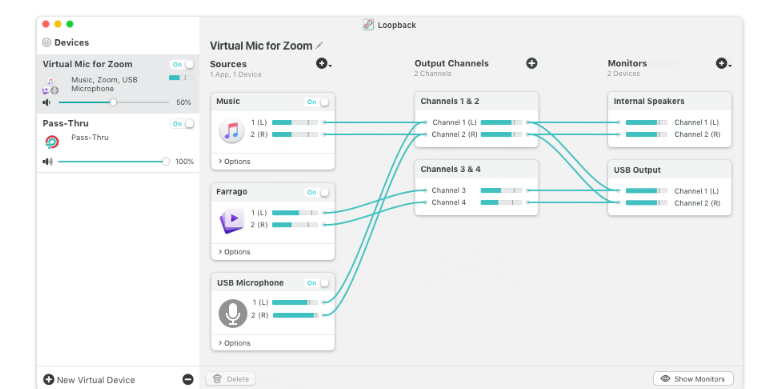
4. RogueAmoeba’s Loopback
RogueAmoeba’s Loopback works as a virtual device that records sound from any application like a game, zoom meeting, iPhone, and Safari. This tool merges in the built-in screen recorder of your Mac like QuickTime Player and Screenshot Toolbar. You can use it as an audio player.
5. Snagit
If you are not satisfied with the built-in screen recording tools on Mac and need a tool that provides good video quality and the best video editing features, then you can get Snagit on your Mac. To Screen record on Mac will be more interesting and easy for you with Snagit screen recording software. The easy editing and clear video make it an ideal tool for MacBook users.
Closing Remarks
Knowing How to Screen Record on Mac can be of great help. You can record whatever is going on your screen. You can save it or share it with anyone you want to.
Mac allows its users to screen record on Mac with its built-in tools like Screenshot Toolbar and QuickTime Player. These are some of the very easiest ways to screen record on Mac. But for most of the users, these tools provide limited features. In that case, users can try out different third-party applications.
These applications are designed to assist you in recording your screen on your computer in an easy way. Some of the best of these applications are discussed in the information given above.
FAQs:
What is the quickest way of screen recording on a Mac?
Using QuickTime player fastest method. This feature can be opened instantly on your Mac. Instant opening leads toward instant recording.
Is it possible to record audio as well while screen recording on Mac?
Yes. It, indeed, is possible. There is a separate option available for that. All the methods that we have discussed above can help you with that.
Where are my recorded files saved?
Your screen recording files are saved on your desktop by default. These files are saved as. Mov. However, you can also select a specific destination for saving. You can do it from the “Option” menu section.
Can I stop screen recording with the help of keyboard shortcuts?
Indeed. You can stop by simply pressing Command + Control + Esc. The recording will be stopped.
Is it possible to record the movement of the mouse while recording the screen?
Yes. It is possible. For this, you can enable the “Show Mouse Pointer” option in the Screenshot tool.
Can I edit the screen-recorded video right after recording it?
Absolutely, as soon as the video is recorded, you can immediately modify it. With the QuickTime player’s assistance, you may crop, cut, or trim it.